Welcome
Sign in to your account

Enter your email and we'll send a one-time code for instant access.
Stainless steel is widely used across various industries, from kitchenware to industrial parts, due to its durability and corrosion resistance. However, achieving clean and permanent engravings on stainless steel surfaces isn’t easy—unless you have the right tools. A desktop laser engraving machine excels in laser engraving stainless steel, offering precision and speed far beyond manual methods. Whether you're creating personalized gifts or product branding, a laser marking machine can easily handle it, producing permanent and high-quality results.
This blog will cover four main sections:
Fiber laser engraving works by taking advantage of stainless steel's high absorption of the 1064nm wavelength laser. When the laser beam hits the metal surface, the absorbed energy is quickly converted into heat, raising the local temperature above 1400°C, causing the material to melt and vaporize. This results in a permanent engraving or cut. By controlling the temperature within 300-600°C, it induces the oxidation of the chromium in the top layer, forming a nano-scale oxide layer that creates colorful marks like black, gold, and blue.
304 and 316 stainless steel are the top choices for fiber laser engraving. 304 stainless steel is the most commonly used type (e.g., thermos cups), and it efficiently absorbs laser energy to produce clear, durable black marks. 316 stainless steel offers better corrosion resistance, making it ideal for medical tools or marine parts exposed to saltwater or chemicals. It also enables vibrant gold or blue marks, which regular stainless steel cannot achieve.
For smaller desktop laser marking machines, beginners typically start with simple pattern or rotary engraving on stainless steel, while advanced users might explore image engraving and color marking.
Pattern laser engraving is the most basic engraving technique. Simple vector files (SVG, AI) are a great starting point for beginners, perfect for small-scale customizations like gifts, nameplates, and tools. Follow these steps when engraving patterns on stainless steel:
Pattern Preparation:
Import your vector design or high-resolution image into LightBurn. Ensure the design is appropriately sized for the workpiece surface and that lines are thick enough to avoid losing detail. Adjust contrast and clarity for better engraving accuracy.


Photo laser engraving is ideal for portraits, landscapes, and other detailed designs, relying on shadows and grayscale details. It requires precise machine accuracy, with the EM-Smart laser marking machine offering a 0.002mm engraving precision.
1.Ensure the image resolution is above 300DPI to avoid blurry engravings.
2. Apply Grayscale or Dithering effects in LightBurn, adjusting contrast and brightness for clearer results.

3. Unlike vector engraving, you may need to adjust the laser focus repeatedly to achieve the best results, no matter corss-foucus or seperate focusing.
Related Reading:
Color laser engraving on stainless steel relies on adjustable pulse width and frequency to form interference color layers. Polish the workpiece for better reflection, then fine-tune power/frequency to achieve consistent colors.
1. Find "Port Setting" and choose the right laser source: "JPT" or "IPG-YLPM", which are the best two kinds of color engraving laser sources.

2. Color laser engraving requires necessary test runs on the material to determine the optimal color effect. During the color engraving process, frequency and pulse width are the two main factors influencing the outcome, so they should be assigned to the X-axis and Y-axis respectively.
With EM-Smart MOPA (JPT laser source), you can engrave vivid colors on stainless steel or anodized aluminum. Recommended frequency range: 200–2000 kHz, pulse width: 3–10 ns. Always test first and store the optimal settings.

Related Reading:
Using a rotary attachment tools, you can evenly engrave designs on cylindrical surfaces like mugs. In LightBurn, enable rotary mode, enter the diameter, position the design, and start engraving—ensuring smooth rotation and consistent results.
1. Use the shortcut Ctrl + Shift + R or click the rotary icon in the mode toolbar.

2. Select your rotary fixture type, then check “Enable Rotary” and “Return to Starting Point.”For top-to-bottom (or bottom-to-top) engraving, set the Rotary Axis to X-axis; for left-to-right (or right-to-left) engraving, choose the Y-axis.
3. Please note that the size of the carved pattern requires precise measurement. Before final engraving, the recommended power range for surface engraving is 20%~60%, with a speed range of 1000mm/s~2000mm/s. Also, please ensure that the two buttons indicated in the diagram are activated.

Related Reading:
Videos below for detailed rotary attachment connection in LightBurn:
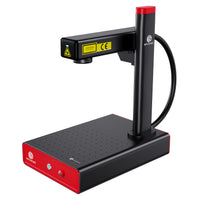
Fiber laser engraving machine for coloring stainless steel, aluminum, silver, gold, and other metals. Portable and affordable.
Learn More >Based on the engraving processes and requirements, the EM-Smart MOPA fiber laser engraver is the best choice for stainless steel engraving. Beyond basic marking, its MOPA technology supports high-quality color marking and fine engraving.

EM-Smart Mopa offers 20W/30W/60W power options. Precise pulse-width and frequency adjustments create stable interference colors on stainless steel, achieving distinctive visual effects for logos, gifts, or artworks.

EM-Smart MOPA with industrial-grade JPT laser achieves 10,000 mm/s engraving speed and ±0.002 mm precision on stainless steel, ensuring rapid, detailed results for complex patterns or batch-produced plaques.
EM-Smart MOPA's compact benchtop design with rotary axis enables 360° engraving on cups/bottles/tool handles. The 150×150mm area supports marking flat sheets, thin objects, and multiple workpieces for multi-industry use.

Line Interval—too wide loses detail, too narrow wastes time. Power and speed also influence depth and sharpness.
Depending on depth, sanding and polishing work best. For shallow marks, use progressively finer sandpaper. Chemical etching is possible but less effective.
For surface marking and shallow engraving, 20W–50W fiber laser engravers are sufficient.
Laser engraving can remove the protective chromium oxide layer, making it vulnerable to rust. Apply a protective coating (oil, wax, sealant) afterward to prevent this.
This guide covered four common stainless steel engraving applications with a desktop fiber laser engraver: pattern engraving, photo engraving, color marking, and rotary engraving. By following the correct LightBurn settings and process steps, you can achieve professional-grade results.
With its user-friendly operation, flexibility, and advanced MOPA laser technology, the EM-Smart desktop fiber laser marking machine is an ideal choice for small-batch stainless steel customization, branding, and creative projects.


