Welcome
Sign in to your account

Enter your email and we'll send a one-time code for instant access.
While laser engraving has mostly been used in industrial settings, brands like EM-Smart are bringing it to our desks! Now, with desktop laser engravers, crafting has become more efficient and detailed.

For beginners in the world of laser engraving, you might be wondering where to start. This blog will guide you through everything—from what laser engraving is to how to choose the perfect laser engraver for your needs. This beginner's guide includes the following parts:
Laser Engraving Software
How to Use a Desktop Laser Engraver Machine
Simply put, laser engraving is the process of removing material from a surface using a powerful light beam, without the laser actually touching the material. You can create detailed and lasting designs—like text, logos, or patterns—on many different surfaces.
In factories, experts say laser engraving is a non-contact marking method, where the laser beam removes material, leaving behind a precise and permanent mark.
The stimulated emission of light generates a laser. Unlike regular light sources, lasers have the same frequency, phase, propagation direction, and polarization state as the incident light, giving them the following unique characteristics:
There are two work principles for laser engravers:
"Thermal Processing" involves a high-powered laser beam directed at the surface of the material. The material absorbs the laser energy, causing a thermal excitation process in the irradiated area. This results in the material's surface (or coating) temperature rising, leading to phenomena like transformation, melting, ablation, and evaporation.
"Cold Processing" uses high-energy (UV) photons capable of breaking chemical bonds in the material (especially organic materials) or the surrounding medium, causing non-thermal damage. Due to cold processing, it breaks chemical bonds without causing the "thermal damage" side effects, so there is no heating or thermal deformation in the inner layers or nearby areas of the material being processed.

A fiber laser mainly consists of several components: the pump source, coupler, rare-earth doped fiber, and the resonator.
The pump source is made up of one or more high-power laser diodes, which emit light (called pump light). This pump light enters the rare-earth-doped fiber through a special structure. After the fiber absorbs the pump light, the energy of the particles inside changes, triggering the release of laser light. Finally, this laser light is reflected by the resonator, resulting in the laser output we see.
You might be wondering how laser engraving compares to other marking methods. Here are some key differences:
Fiber Lasers can mark items at speeds up to 15,000mm/s, making them perfect for businesses that need fast, precise custom markings.
For new users, the real benefit of laser engraving is its speed and precision. This allows operators to easily create more creative projects.
For beginners, choosing the right laser engraving machine is crucial. There are many desktop laser engravers on the market, but each type works differently and is suited for different materials due to the laser technology used.
There are four main types of laser engraving machines, each with its own way of working to meet different needs:
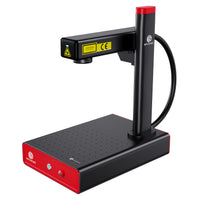
Fiber laser engraving machine for coloring stainless steel, aluminum, silver, gold, and other metals. Portable and affordable.
Learn More >Actually, an IR laser is also used in some desktop laser engravers, like xTool F1 and LaserPecker 4, but this laser appears as a part of the dual laser sources for metal laser engraving.

Only two main factors -- power and laser type, will decide the price of a laser engraving machine. We can list price from high to low based on laser types: UV Laser, Fiber Laser, CO2 Laser, Diode Laser. And the higher power brings a higher cost.
For a desktop fiber laser engraver, it starts from $1,500 with 20W laser power.
Based on Commarker Omini 1, a 10W UV laser engraver costs $8,500;
A CO2 Laser Engraver starts with 30W laser power, which costs $4,300.
And there comes the novice-friendly diode laser, a 10W diode laser engraver costs only costs $300, a 20W commonly used one is around $1,200.
And the above is only the cost of a desktop laser engraver; you may need to buy some accessories like rotary attachment, which may cost around $300.
If you would like to buy one for a hobby, a diode laser engraver can be your first step. Let alone the price, there are more you should consider before buying: work height and area, software, product warranty, after-sales service, and its user forum or craftzone.

Grasp the basics—like using fiber lasers for metal engraving and blue lasers for wood. Common materials in everyday life, like aluminum, iron, copper, silver, and gold, are perfect for fiber laser engraving. Raw wood, acrylic, and leather are the specialties of blue and CO2 lasers.

Some materials are unsafe to engrave, mainly because they may produce toxic fumes or damage your machine during the engraving process. Avoid using the following materials:
For beginners, user-friendly software makes laser engraving much easier. While the desktop laser engraver acts like your hand, carving out the ideal final product, the software is the brain, turning creative ideas into actionable instructions.
Tip: Try the free trial of LightBurn, or if you’re looking to save some money, LaserGRBL is a solid choice. Some brands, like EM-Smart, even offer free versions of EZCAD or LightBurn software.
Some manufacturers also provide their proprietary software, which is very beginner-friendly. These programs often have simple interfaces and easy engraving settings, making them popular among engraving users.
Note: For the best results, save your designs as vector files.
Most machines use SVG, DXF, or BMP files. SVG and DXF are vector formats, which keep lines smooth and shapes accurate. BMP is a raster format, suitable for photos and shaded images. AI format is also a good option, as it provides clearer pattern details.
Related Reading: Laser Cut Files
The process is similar across most machines, with four main steps: editing the file, setting parameters, engraving, and post-processing.

You can either design the file or import a pre-made one. Adjust the size, DPI, gamma, and contrast in the software, then preview the engraving to confirm the position and size.

Most machines come pre-configured with basic settings. Just connect the machine and start working. For simple engravings, adjust power, speed, and frequency based on material settings or tests. Complex tasks like color engraving require adjusting pulse width and frequency.
Before engraving, wear laser safety goggles and lower the protective cover to protect your eyes. Don’t leave the machine unattended for long.

For metal items, wait for them to cool down before handling. If you’re not happy with the result (e.g., faint marks), don’t move the item. Simply perform a second engraving with the protective cover on.

Start with simple projects to build confidence and understand how the machine works. Here are some ideas to try:
Choose designs with basic shapes or text. You can find free templates online or draw your own. Practice with scrap material.
When using a laser engraver, always wear protective gear to prevent burns, cuts, and damage from harmful light.
For safe and efficient laser engraving, keep these items in your workspace:
Always wear glasses that block harmful laser light, with the correct optical density (OD) for your machine. CO₂, fiber, and UV lasers require specific glasses.
These enclosures contain stray laser beams and block dust and smoke, increasing safety and keeping pets/children away.
These are not required, but they improve your workspace:
After engraving, follow these steps to enhance and protect your project:
Tip: These finishing steps ensure clarity and durability, especially for metal, reducing rust risk.
You’re now ready to complete your first laser engraving project!
It depends on your specific needs. For common non-metal materials like thin wood or leather, a 10W blue laser is sufficient. If you need to engrave or cut metals, a 20W fiber laser machine is recommended. For frequent metal cutting, consider a 50W or higher fiber laser.
Yes, as long as you wear safety goggles, use the protective cover, and don’t leave the machine unattended, especially with flammable materials.
The best methods are sanding with fine-grit sandpaper or using a secondary laser scan to remove the surface engraving marks. Or, engrave with other designs.
Laser engraving work is not as hard as you think, it is more like one of the crafting works. Laser users use a desktop laser engraver to explore the laser engraving journey; DIY novices and craftsmen use it as a capable assistant. Choosing the right laser engraving machine can be your first step in your laser engraving journey.


