
Laser engraving glass is the ultimate way to turn everyday items into personalized art. A focused laser beam dances across the surface, leaving behind frosted lines or crystal-clear etchings that won’t fade or chip away. From personalized barware to elegant decor, this technology turns fragile glass into a durable canvas for your creativity. Ready to see how light can carve lasting beauty? Let’s dive in.
I. Can You Laser Engrave Glass?
Yes, you can laser engrave glass, and it’s easier than you might think! Laser engraving glass involves using a focused laser beam to etch intricate designs, logos, or text onto the surface of glass items. The laser doesn’t physically touch the material, so it’s a non-contact process that minimizes the risk of cracks or chips.
The beauty of laser engraving glass is its precision—laser systems can create highly detailed designs, from simple text to complex artwork. Whether you’re personalizing a wine glass, creating custom awards, or adding a logo to a storefront window, laser engraving lets you achieve sharp, permanent markings that are both visually stunning and durable.
So, whether you're a hobbyist or a professional, the answer is clear—laser engraving glass is an effective, creative way to make any glass item truly unique.

II. How to Choose the Right Glass Engraving Machine?
1. Laser Type
• Fiber Lasers: While fiber lasers are highly effective for metals and harder materials, they generate more heat, making them less ideal for engraving glass without causing potential damage.
• Diode Lasers: Diode lasers are the best choice for glass engraving. They offer precise control over power and heat, allowing you to achieve delicate, detailed engravings without risking damage to the glass. They are more affordable, compact, and perfect for personal and small-scale engraving projects.
2. Power and Speed
Choose a laser engraver with adjustable power settings to control the depth of the engraving. Lower power settings are crucial for glass to avoid cracking. The speed setting affects the quality of the engraving: slower speeds allow the laser to make more precise, deeper cuts for intricate designs.
3. Workpiece Size
If you’re engraving cylindrical glass (like glasses or bottles), ensure the engraver is compatible with a rotary attachment. This ensures that your glass pieces are evenly rotated for consistent engraving on curved surfaces.
4. Ease of Use
Look for a laser engraver that features a user-friendly interface and is compatible with common design software for precise and easy creation of your artwork. This ensures you can get started quickly and make adjustments as needed.
5. Budget and Maintenance
Consider the overall cost of the machine and its maintenance requirements. Diode laser engravers are typically more affordable and require less maintenance compared to other high-power machines, making them perfect for hobbyists or small businesses.
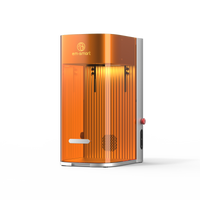
Recommended: EM-Smart Dual Laser Engraver
For high-quality glass engraving, the EM-Smart Dual Laser Engraver is a top choice. It offers precise control, adjustable settings, and a rotary attachment for engraving on both flat and cylindrical glass. Affordable and easy to use, it’s perfect for small-scale projects or personal use.
III. How to Engrave Glass?
In this part, we’ll use the EM-Smart Dual Laser Engraver as an example to show you how to laser engrave glass with precision and ease. Let’s walk through the process.
Step 1: Preparation
Before starting the engraving process, ensure your EM-Smart Dual Laser Engraver is ready for use. Make sure the machine is powered on, the workspace is clear, and you have the necessary materials—such as glass, cleaning supplies, and any tools like gloves or a rotary attachment (if engraving cylindrical glass). Having everything set up and organized will help ensure a smooth engraving process.
Step 2: Design Your Artwork
This is where the creative process comes into play. When creating a design for laser engraving, simplicity and clarity are your best friends. The more detailed the design, the more challenging the engraving process can become, as it may require additional fine-tuning of your laser’s settings.
Choose a Simple and Clear Design:
Dual Laser Engraver can handle intricate designs, but it’s always a good idea to start with a simpler design, especially if you’re new to engraving on glass. By creating clean, crisp lines, you’ll ensure that the engraving machine can follow your design with ease and precision.
Optimize Your File:
The best file formats for laser engraving are vector files (SVG, DXF) as they allow for greater scalability without loss of detail. Bitmap files (JPG, PNG) can also be used, but they may not provide the level of precision that a vector file does. If you are working with bitmap images, make sure they are high resolution to avoid pixelation during engraving.
Use Layered Designs for Multiple Effects:
One of the great features of the dual laser engraver is its ability to work with layered designs. If your design contains multiple colors or shades, layering it and applying different engraving settings to each layer can produce a beautiful, multi-dimensional effect. For example, you might choose a higher power setting for darker areas and a lower power setting for lighter areas.

Step 3: Clean the Glass Surface
Cleanliness is critical when working with glass, as any dirt, oil, or residue can negatively impact the engraving quality. It’s essential to ensure the glass is spotless to achieve a clean, crisp engraving.
Choose the Right Cleaning Solution
Cleaning your glass thoroughly before engraving ensures that there is no residue or dirt left on the surface. Use a mild soap solution or rubbing alcohol to wipe the surface of the glass. Be sure to remove any dust, oils, or fingerprints that might have been left behind after handling.
Avoid Contaminating the Surface
Once you’ve cleaned the glass, it’s crucial to avoid touching the engraving area. Even a small fingerprint can interfere with the engraving process. To prevent this, wear clean gloves when handling the glass after cleaning.

Step 4: Apply Paint or Color
Applying color is necessary for glass engraving; adding a coat of paint or pigment can help make your engraving stand out. This is especially useful for designs that require greater contrast or visibility.
Select the Right Type of Paint
Darker colors, particularly black, absorb more laser heat, which can lead to a deeper engraving. Light colors, like white or yellow, reflect more laser heat and can result in a less noticeable engraving. Consider using a black spray paint or a fabric dye that is specifically designed for use on glass.
Ensure Even Coverage
When applying the paint, ensure that it is evenly spread across the glass surface. Uneven coverage can lead to inconsistent engraving, so take your time to apply the paint in smooth, even layers.

Step 5: Set Up the Dual Laser Engraver
The dual laser engraver is a highly flexible and precise laser engraving tool. To get the best results, it’s important to correctly configure the engraver’s settings.
Adjust the Power Settings:
The power of the laser determines how deeply it will engrave into the glass. For glass, a lower power setting is often necessary to prevent cracking or excessive heat buildup. Generally, you’ll want to set the power level to 30%–50%. If the engraving design is intricate, you may need to use a lower power setting to ensure that finer details are captured accurately without causing damage.
Adjust the Speed:
The engraving speed controls how fast the laser moves over the glass surface. A slower speed allows the laser to spend more time on each area, resulting in a deeper engraving. For simple designs, faster speeds can be used, but for detailed work, it’s essential to slow the machine down to achieve the best results.
Here is a parameter set for reference.
| Laser Type | Blue Light |
| Power | 90 |
| Speed | 50 |
| Frequency | 20 |
| Pulse Width | / |
| Filling Method | Continuous Zigzag Filling |
| Filling Density | 0.03 |
| Filling Times | 1 |
| Filling Angle | 0° |
| Focal Length | Focus (378mm) |
Test the Settings:
If you’re new to laser engraving on glass, it’s always a good idea to test your settings on a piece of scrap glass before starting the final project. This allows you to make adjustments to the power and speed without risking your main piece.

Step 6: Position the Glass on the Engraver
Now that the glass is cleaned, painted (if necessary), and your settings are adjusted, place the glass securely on your dual laser engraver’s work surface. Ensuring that the glass is stable is important to avoid any movement during the engraving process, which can cause misalignment and uneven results.
Secure the Glass:
Make sure the glass is held firmly in place. If it’s not properly secured, even slight movements during engraving could distort the design.
Start Engraving:
Once everything is set up and the glass is in position, you can begin the engraving process. Keep an eye on the engraving as it progresses, especially during the first pass. This will allow you to catch any potential issues early on and make adjustments if needed.

IV. What Should You Do in the Post-Engraving Process?
Once the engraving process is complete, there are a few final steps to ensure that your engraving is clear and professional.
Clean the Glass:
After the engraving is finished, you will likely notice some residual dust, paint marks, or smoke residue left on the surface of the glass. To remove this, gently wipe the glass with a soft cloth. If necessary, rinse the glass under warm water and dry it with a lint-free towel. Be careful not to scratch the engraved surface during cleaning.
Inspect the Engraving:
Once the glass is cleaned and dried, carefully inspect the engraving. Ensure that the depth and detail of the design match your expectations. If some areas seem too shallow, you can perform additional passes with the engraver to achieve the desired depth.
Check for Cracks or Imperfections:
After engraving, inspect the glass for any potential cracks or imperfections that may have occurred during the engraving process. If the glass has cracked, you may need to adjust the power or speed settings in future projects to prevent this from happening again.

V. Conclusion
Laser engraving glass with the dual laser engraver is an excellent way to create custom, detailed designs. By following these steps, you can achieve flawless engravings with precision and ease. From the preparation stage to the final post-processing steps, each part of the process is critical in ensuring the best possible outcome.
With its versatility and control, the EM-Smart Dual Laser Engraver makes glass engraving a simple and rewarding process for both beginners and pros.
EM-Smart Dual -- 20W Fiber&Diode Dual Laser Engraver
EM-Samrt Dual handles with 300+ materials with dual laser sources, achieves laser engraving, etching and cutting with ease.
Learn More >About US
With 26 years of laser industry experience, EM-Smart has been committed to designing and manufacturing portable laser marking machines as well as developing innovative laser solutions for a wide range of industries.
For any more information, please contact support@em-smart.com.


