Welcome
Sign in to your account

Enter your email and we'll send a one-time code for instant access.
This guide will walk you through the installation process for the software that controls your EM-Smart laser engraving machine.
You have two software options for your laser engraving machine: EZCAD and LightBurn.
If you need guidance on installing and setting up LightBurn for your EM-Smart laser, you can refer to this article: LightBurn Installation Guide: Set it up For your Fiber Laser Engraver.
Watch the video guide:
Note: If you have previously installed LightBurn on this computer, you can directly skip to Part 2

Copy the entire folder from the USB drive to your computer's desktop.
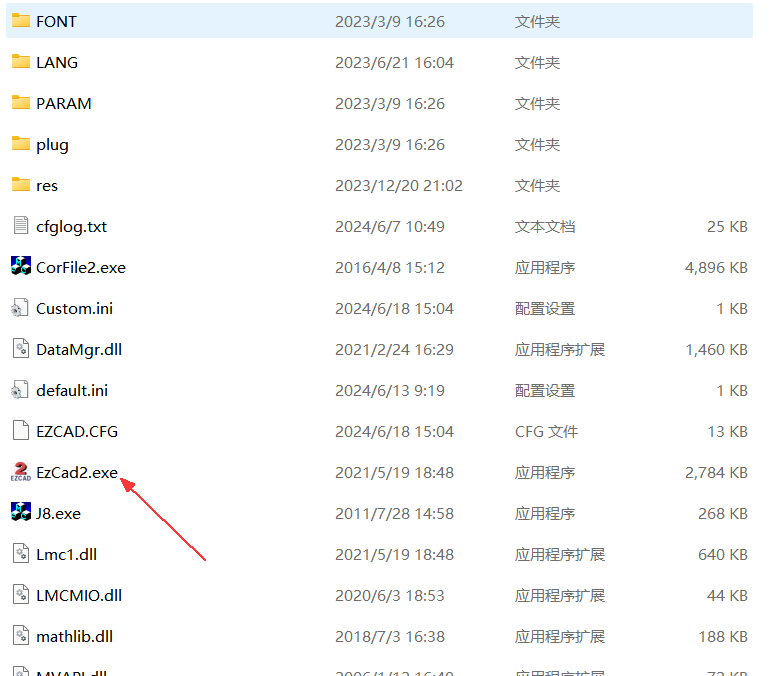
Open the EZCAD software (indicated in the image below).
For easy access, you can create a shortcut to EZCAD on your desktop. This will help you quickly find the software next time you need it.
Click on an empty area of the software (don't import any files or content yet).
Click "Red" (ignore the pop-up window and don't close it).
 Two red dots will appear on the workbench of your EM-Smart laser engraver.Slowly turn up and down the handle to align the two red dots till they overlap each other. That is your focal point.
Now you can write any text or draw any pattern or import your vector image and start engraving!
That's it! You've successfully installed EZCAD software, and you can start engraving using your EM-Smart laser engraver.
Important:
If you have previously installed LightBurn on this computer, follow these steps to install EZCAD.

Refresh your Device Manager. You'll still see the LightBurn driver listed (with a yellow exclamation mark).
Right-click on the LightBurn driver and select "Update driver".

Choose "Search my computer for drivers".
 Select the EZCAD driver folder, which you can find on your USB drive (you can copy this folder to your computer if you prefer).
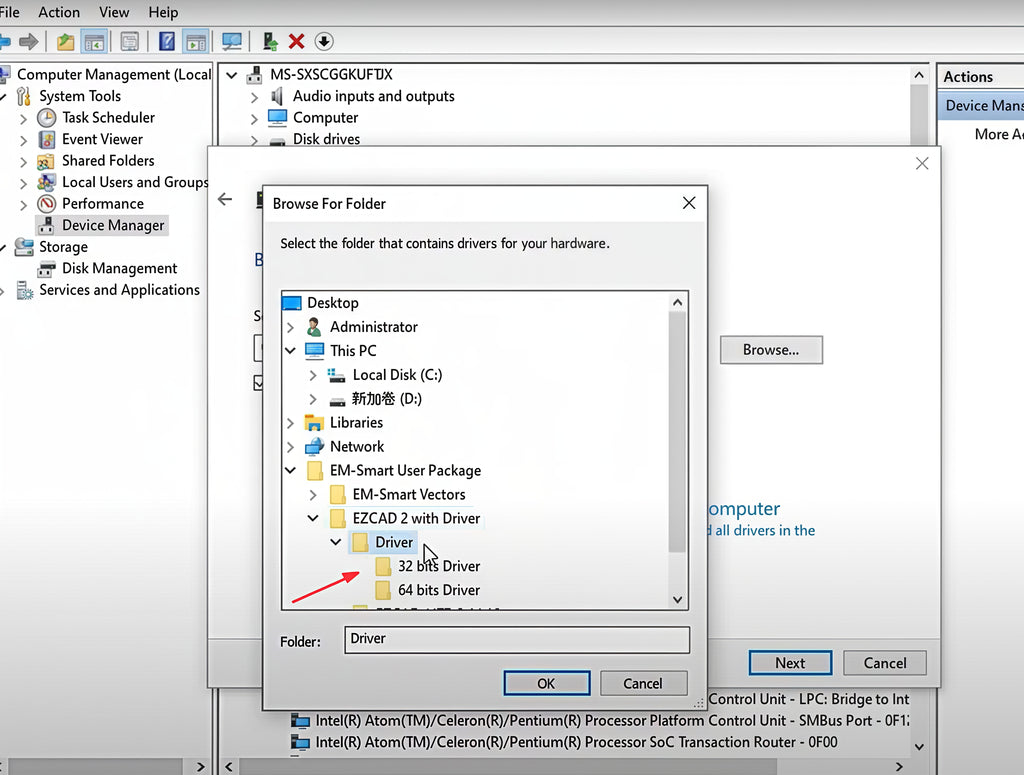
The EZCAD driver will now be installed.
 Step 4: Open the Software
Open the EZCAD software (indicated in the image below).

Follow the same steps as in Part 1 above to find the focus.
Important:
Have any questions about installing EZCAD or LightBurn? Feel free to contact our technical support team at sales@em-smart.com, and we'll be happy to help!


1 Comment
I have looked everywhere and cannot find how to install ezcad on a linux system. cananyone tell me if it is possible.