Laser engraving wood is an exciting way to bring your creative ideas to life! Whether you’re just starting out or you’ve been crafting for a while, using a laser engraver to personalize wood projects is both fun and rewarding. If you’ve ever wanted to turn simple wood pieces into something special, laser engraving is the perfect tool. In this guide, we’ll walk you through the basics of wood laser engraving, and offer tips to help you avoid common mistakes. Ready to start engraving? Let’s dive in!
I. Types of Wood Best for Laser Engraving
Choosing the right type of wood is the first step to achieving great results with your laser engraver. Different wood types react differently to the laser, and knowing which one to use for your project can make all the difference. Here’s a breakdown of the best wood types for laser engraving:
• Softwoods: Softwoods like pine and cedar are easier to engrave and are ideal for beginners. They provide smooth, clean results and are perfect for creating decorative items like signs, coasters, and photo frames.
Pine: Easy to engrave with clean edges, making it a popular choice for intricate designs.
Cedar: A great choice for creating rustic or natural-looking engravings, especially for personal gifts or decorative home items.
• Hardwoods: Hardwoods like cherry, walnut, and oak offer richer textures and higher contrast in engravings, making them perfect for more refined designs. However, they require higher power settings due to their denser composition.
Cherry: Known for its smooth surface and reddish hue, cherry wood engraves with great detail and creates a warm, classic look.
Walnut: Dark and dense, walnut provides a beautiful contrast for fine, detailed engravings, making it a favorite for high-end custom projects.
Oak: Offers a sturdy surface with great contrast, perfect for creating both simple and intricate designs.
• MDF/Plywood: MDF (Medium Density Fiberboard) and plywood are great for laser engraving, especially when you're looking to make multiple items at once. These materials are affordable, easy to cut, and engrave well with a smooth surface. Keep in mind that MDF can release toxic fumes, so make sure to work in a well-ventilated area or use an exhaust system.
In the next section, we’ll dive into how to get your designs ready and start engraving with your dual-laser engraver!
II. How to Choose the Right Machine for Wood Laser Engraving
When selecting a laser engraver for wood, there are a few key factors to consider that will help you achieve the best results:
1. Power of the Laser
Higher power machines are ideal for engraving thicker or harder woods.
Softer woods (e.g., pine, cedar) require less power, while hardwoods (e.g., oak, walnut) need a more powerful machine for deep, detailed engravings.
2. Size of the Work Area
Larger work areas are necessary for engraving bigger pieces like signs or furniture.
Smaller machines work well for detailed items like jewelry or coasters.
3. Laser Type
Fiber Laser: High precision and speed, perfect for intricate details.
Diode Laser: Flexible and cost-effective for lighter tasks.
Dual Laser Systems (e.g., EM-Smart Dual): Offers the best of both worlds, handling a wide variety of materials and engraving depths. It’s great for both detailed work and larger projects.
4. Software Compatibility
Look for a machine with intuitive software like LightBurn that allows you to easily design and modify your engravings. For those looking for versatility, precision, and power, the EM-Smart Dual Laser Engraver is an excellent choice.
III.Step-by-Step Guide to Laser Engraving Wood
In this section, we'll show you how to engrave wood using the EM-Smart Dual Laser Engraver. Follow these simple steps to create precise and detailed designs with ease:
Before you start – checklist: Your Wood Piece, EM-Smart Dual, protective goggles
Step 1: Set Up the Engraver
First, make sure your engraver is properly set up. This includes installing the necessary software, connecting the machine to your computer, and making sure the material is securely placed on the machine bed.
Step 2: Prepare Your Design
Choose or create your design using software like LightBurn (See LightBurn Guide) or other compatible programs. Whether it’s a logo, image, or custom artwork, ensure your design is suitable for engraving on wood.

Step 3: Electric Focusing
Use the electric lift feature to adjust the material height, making sure the laser focus is perfectly aligned with the surface of the wood. This ensures precision for cleaner and faster engravings or cuts.
Step 4: Adjust Parameter Settings
For optimal engraving results, you need to adjust the power, speed, and frequency based on the type of wood you are working with. Here's a general reference for wood engraving settings on the EM-Smart Dual Laser Engraver:
Step 5: Finalize Your Design in LightBurn
Complete marking design in LightBurn software, including patterns, text and other content. Click the "Preview" button on the software interface. The software displays the path of the laser spot, usually with lines of different colors to indicate the different marking paths. Check that the path matches expectations and that there are no missing or wrong parts. If problems are found, adjustments can be made in the preview, such as modifying the path order, adjusting parameters, etc.
Step 6: Align Material with Camera Preview
Connect the EM-Smart Dual engraver to your PC using the included Type-C cable. Open the camera feature in LightBurn to preview the position of your material. Adjust the material’s position so it aligns perfectly with your design. Once you're satisfied with the alignment, turn off the camera preview.
Step 7: Material Testing
Before starting the final engraving, it’s important to run a test on your material. This helps ensure that the settings—such as power, speed, and frequency—are correct for the wood you're using. Testing allows you to check for potential issues, such as scorch marks or uneven engraving, so you can adjust the parameters accordingly. It also ensures your design will come out clean and sharp. Always test on a scrap piece first to avoid wasting your main material.
Step 8: Start Engraving
Set the processing sequence in the optimization settings: first start with high power high speed cutting, slowly reduce the speed blue light cutting to avoid overheating of the material damage wood surface caused by flames. Use the red preview border to observe the machining position. Click on the mark to wait for processing to complete. After the system stops working completely, open the protective enclosure and take out the finished product to observe the effect.
Step 9: Post-Engraving Finishing
Once your engraving is complete, the next step is to clean and finish the wood. First, carefully remove any debris or residue left from the engraving process using a soft cloth or brush. If there are any rough edges or burn marks, lightly sand the surface to smooth them out. For a polished look and added durability, you can apply a wood finish or protective sealant to enhance the engraving and preserve the wood’s appearance. This finishing touch will not only improve the look but also protect your project from wear and tear over time.
IV. Common Mistakes to Avoid in Laser Engraving Wood
• Incorrect settings for wood type:
Different types of wood require different laser settings. Too much power can cause burning, while too little can result in a faint design. Always test on scrap material before engraving the final piece.
• Not accounting for smoke or fumes:
Laser engraving generates smoke, especially with materials like MDF or plywood. Ensure proper ventilation or use a machine with a built-in exhaust system to avoid damaging your workspace or the machine.
• Skipping the test run:
Never skip the test run! It's essential to test on scrap wood to get the right settings, as each type of wood reacts differently to the laser.
V. Conclusion
Laser engraving wood with a dual-laser engraver is an exciting and accessible option for beginners. The versatility, precision, and ease of use make it perfect for a wide variety of projects, whether you’re personalizing gifts or running a business. With the right machine, like the EM-Smart Dual, you can take your woodworking to the next level with clean, detailed, and beautiful engravings. Don’t be afraid to experiment and try out different projects — the possibilities are endless!
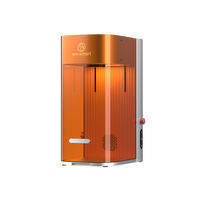
EM-Smart Dual Desktop Laser Engraver with 20W Fiber & Diode
Dual laser engraving machine for 300+ materials' deep engraving and cutting with higher precise engraving results.
Learn More >About EM Smart
At EM Smart, we specialize in providing high-quality laser machines for all your marking, engraving, and cutting needs. Whether you're looking for precision in small-scale projects or efficiency in large-volume production, our advanced machines are designed for versatility and top-notch performance. We are committed to helping you bring your creative and industrial projects to life with the best laser technology available!